
In the last blog, we have discussed the disk management; let’s now go for the Backup and Restore in Windows 10. Backup and restore in Windows 10 allows you to back up your system files, OS image, applications, and data in a different drive or network storage.
There are various ways of backing up data and restoring them; we shall discuss them one-by-one. You may need an external hard drive, pen drive, and DVDs for different backup options depending upon the type of backup you wish to take. For a newbie, I recommend understanding the types and use of back up properly, before going for a jumpstart. Else, you can try it on a dummy data, and verify before formatting, deleting, or changing partitions, drives, etc. containing the important information. This article explains the restore processes if you have not taken any backup; for the article on taking backup and restore it, please follow this link.
Various options of Backup and Restore in Windows 10
There are numerous backup and restore tools provided in the Windows operating system. Windows 10 includes the Backup and restore tool of Windows 7 as well as the image backup and File history introduced from Windows 8. Besides, you also have the option to try tools as automatic repair and system restore. First, I will tell you the methods used for a corrupted OS, if you don’t have a backup.
Recovery options if there is no any backup
If you don’t have the back up and the PC crashes, you may try to recover with the following options.
1. Startup Repair
In case of a crash of the Operating System, you should first try to run the automatic repair. It is a built-in tool and should start automatically. Or the OS may prompt you to repair your PC or Start Windows Normally at the boot time. If the PC fails to start normally, then go for the Startup Repair option. You can also invoke this option from the recovery console.
The following figure-1 shows the recovery console of Windows. In most failure cases, Windows enter this mode automatically. In a normal running PC, you can enter this mode by holding the shift key while restarting the PC. Else, press the F11 key at the reboot. You can access the recovery mode in a PC by the above two methods. Various recovery tools are available in this mode. At first, let us see the automatic repair option.

From the above screen, choose the troubleshoot option. In the troubleshoot screen as shown in figure-2 you will get two options- Reset and Advanced options. Go to Advanced options.
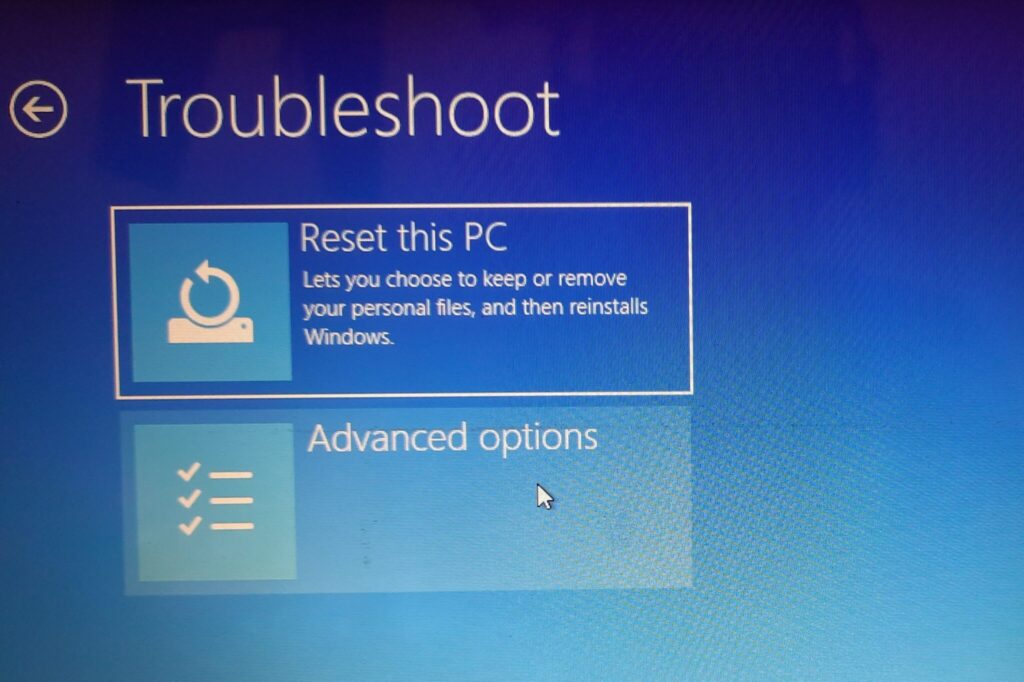
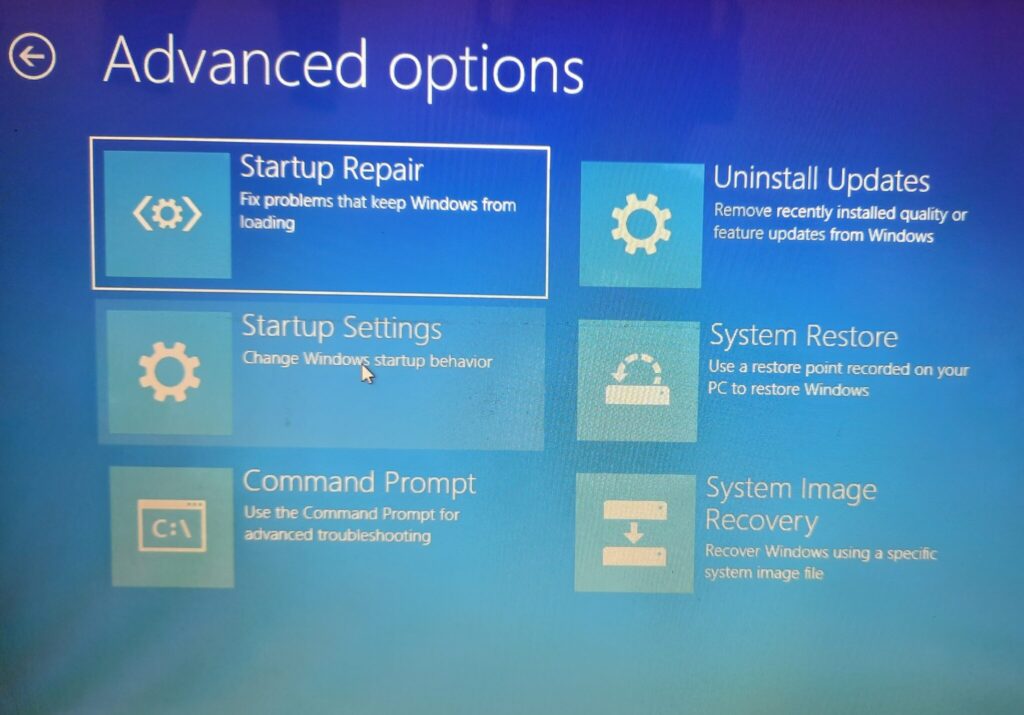
From Advanced options, the Windows will give various tools, as shown in figure-3. Run the Startup Repair.
2. System Restore
If the Startup Repair option fails to fix your PC, then go for the System Restore option from the screen shown in Figure-3. It will restore your PC to a previous date when it was running fine.
It will not change the files and data of the PC, but the programs and drivers installed after the restore point may be uninstalled.
You can choose the restore point manually from the automatic restore points created by the Windows. If you have manually created a restore point, you can opt for that too. I will discuss in later sections about the creation of restore points.
You can also run the system restore from the Command Prompt. Go to the Command Prompt from the Repair option as discussed in section-1. You can also access the Command Prompt from the screen shown in Figure-3. To run the system restore from the Command Prompt, type the command rstrui.exe. It will start the System Restore application as shown in Figure-4.
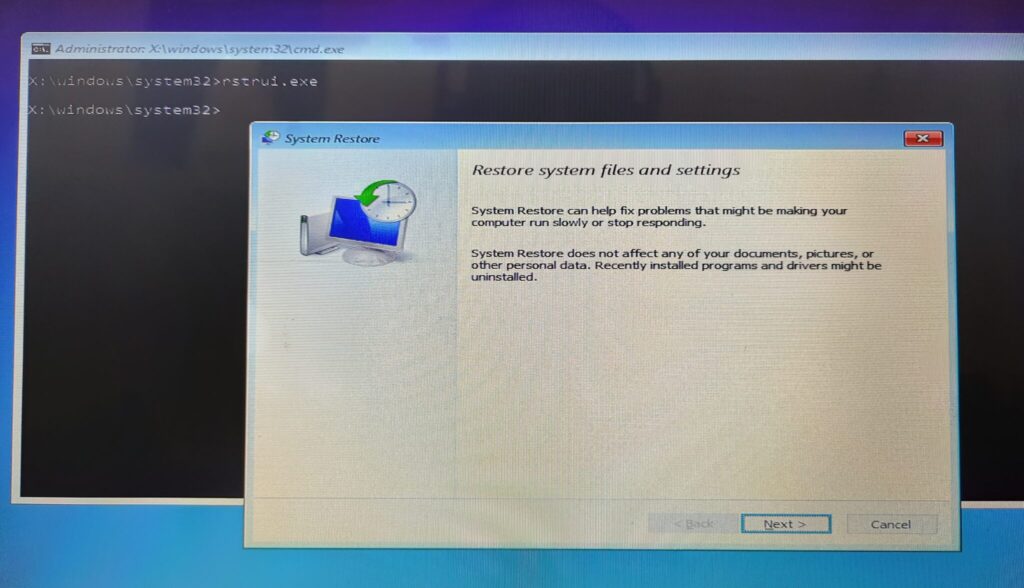
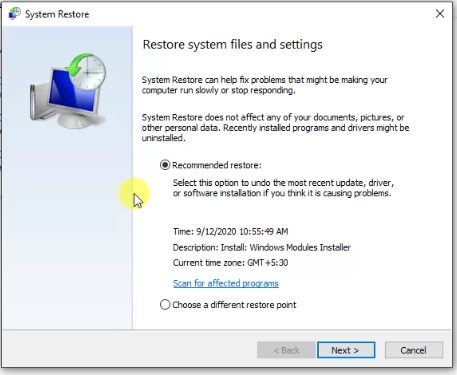
From the system restore you can access the following wizard.
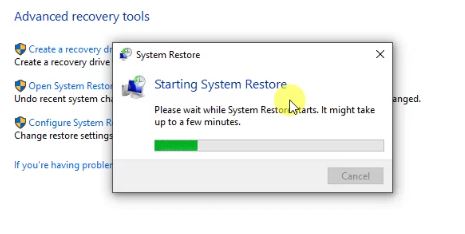
The system will recommend a restore point automatically, probably the recent one. You may go with the recommended restore point; else, you may choose a different restore point.
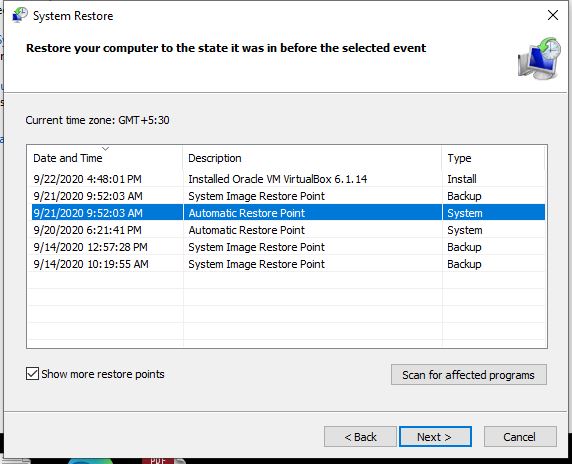
It will list the different restore points, check the show more restore points checkbox for more options. Or you may proceed with a restore point of your choice.
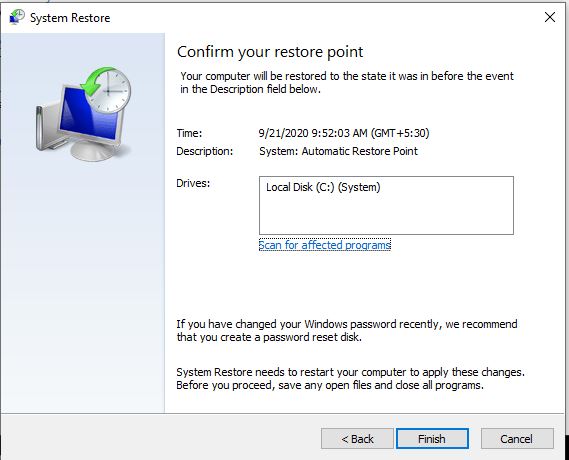
Select one of the restore points and click the Next button. On the next screen, click Finish. The PC will be restored to a previous date.
Create restore point manually
You can also create a restore point for future use when the PC is working fine. To create a new restore point, please open-
Control Panel > File History. The following screen will appear.
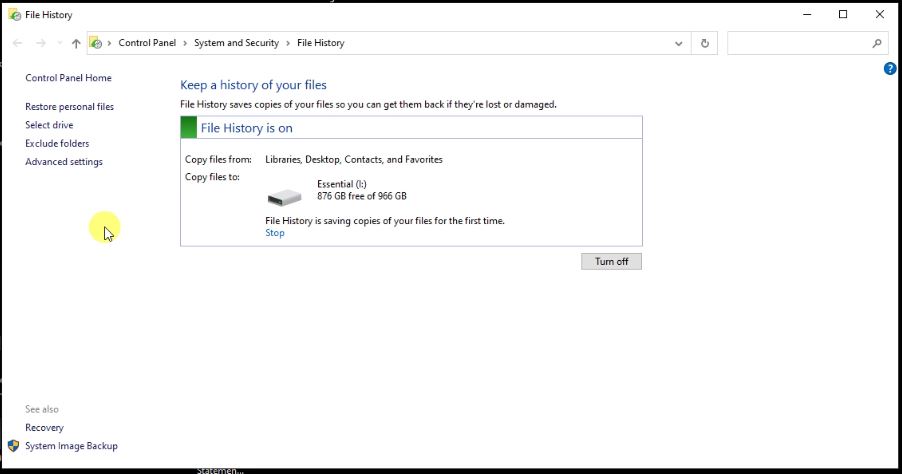
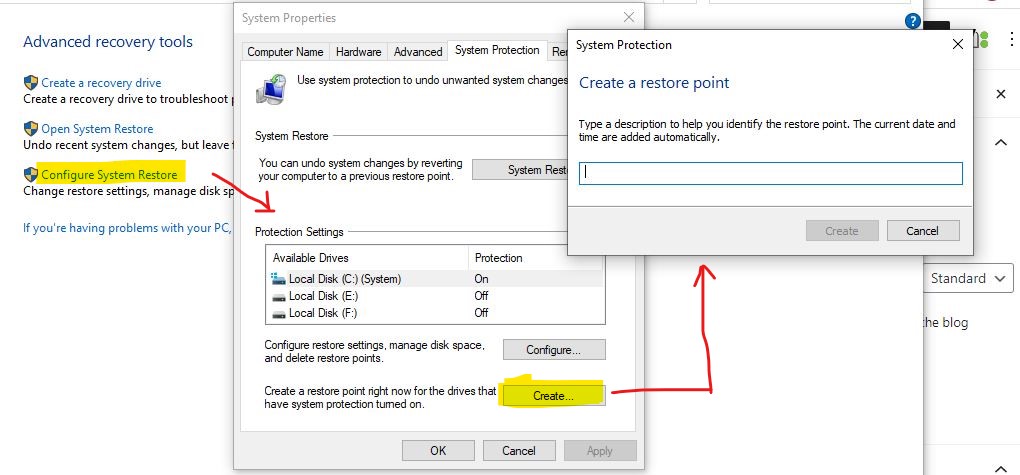
From the File History screen, click on the Recovery tab at the bottom-left. The screen Advanced Recovery Tools will open as shown below. From Advanced Recovery Tools, go to Configure System Restore. You can configure the restore options for various drives from this wizard. To create a new restore point, click on the Create button as shown in the figure below.
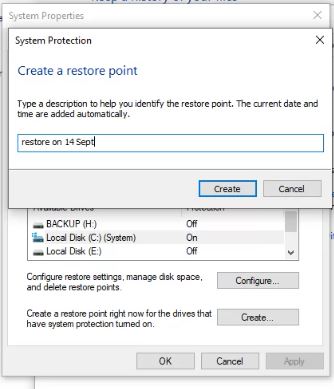
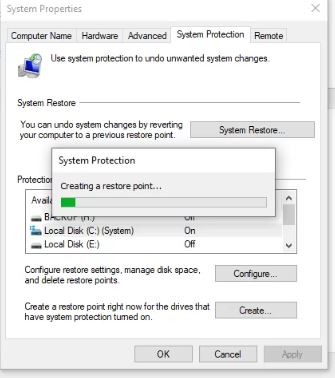
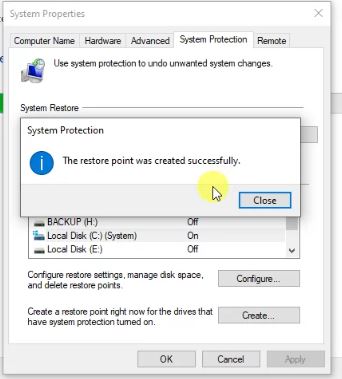
Now give a meaningful description to the restore point, like restore on 14 Sept 2020, then click on the Create button. It will create the restore point and give a success message. The consecutive steps are shown in Figures 11, 12 & 13.
Once created, you can check the restore point by trying to run the system restore. The restore point just created should be there in the list of restore points, as in Figure-7.
3. Reset Windows
If you don’t have the pre-configured back-up and both of the above methods fail, then go for the reset option. I don’t recommend you to run this if you have any backup option. I will explain the processes of restoring from backup in later sections.
The recovery console of Windows 10 allows you to reset your PC in two ways. The first way is to reset with the files and the second way is to reset without files. However, the apps and settings will not be retained from this tool. From the troubleshoot screen shown in the figure-2, go for the reset option to reset the PC.
Enter the RESET mode from the Troubleshoot screen.
You have two optionshere. The first is Reset with the files- this option will try to restore your PC with the Operating System and your files. But you will lose the applications and settings. The second option is resetting the Operating system without files.

It will install a fresh copy of Operating System. You don’t need to provide a back up drive for the installation of OS. If you have any form of backup, you can run some of those even after the OS installation.
So far, I have discussed the three methods to recover your PC if you don’t have a backup drive. Follow my next blog for the other backup options and recovery of windows including files, apps, and settings.
Please share the article and let your friends connect to the Network Hope. You may follow the social media page from the link at the top of web site.


Sir how to restore window when boot ntldr is missing
Make system repair disc to initialize booting …Check the next blog or advanced recovery modes. A system repair disc and recovery drive will work for booting problems.
today i learned by this website how to restore data in win 10….thank u sir