In the previous blogs, I have discussed the image backup feature of Windows. Here, we will discuss extracting a single file or a few files from image backup without restoring the PC completely. I recommend the readers go to previous blogs on Windows backup and recovery. These posts discuss the process of taking backup or recover the PC fully in case of a system crash. Now, let’s have a look at how to extract files from the image backup.
Why you need to extract files from image backup
There are certain situations apart from the system crash when you may feel like getting the files in image backup without going for the complete restoration process:-
- Your system is running fine hence you don’t want to run the image backup. You only need to get back a few files that you accidentally deleted or lost somehow.
- If the user wants to restore the files to another PC.
- You may have installed another OS in your system. All you need is to restore the files already available in image backup.
Well, you may have other valid reasons too. In any case, it will be convenient to backup only the required files by accessing the image backup instead of going for the complete restore process.
How can you extract files from Windows image backup
To extract files from Windows Image backup, you need to mount the drive from the windows disk management utility. Follow the given simple steps to access the files stored in Windows Image Backup.
- First, connect the USB drive containing the image backup folder. For more on taking image backup, please go through this link.
- For the sake of safety, you may copy the image backup folder to another drive as a backup. Though the mounting process does not harm the image, it’s always better to be extra vigil.
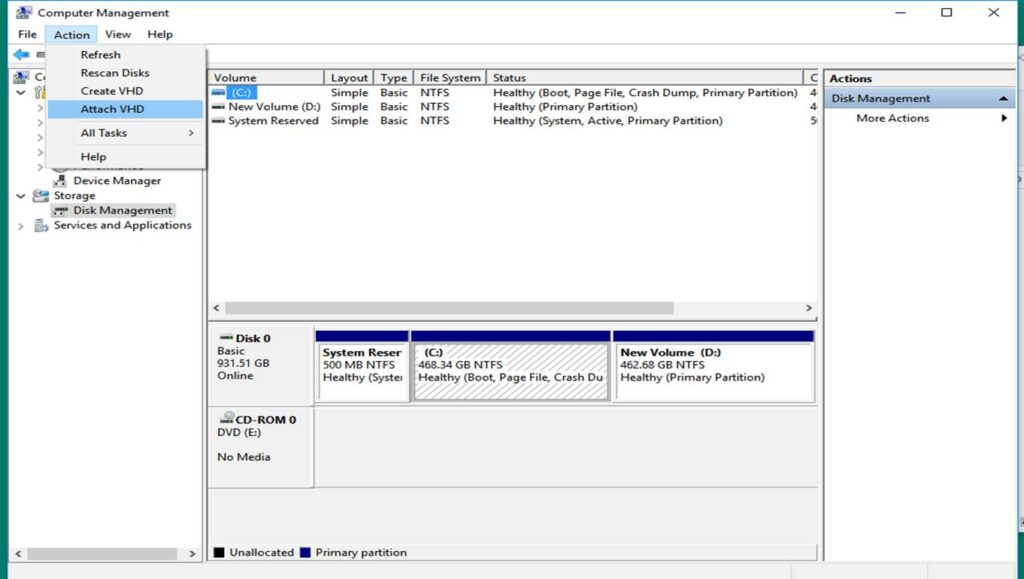
- Now you are all set to extract files from the windows image backup. Just right-click on the This PC icon and go to the Manage option.
- Now explore the Disk Management Wizard by clicking on it from the left pane. You may follow the blog on Disk Management for further reading on Disk management.
- From the Disk Management Action Menu, Click on Attach VHD as shown in the fig below.
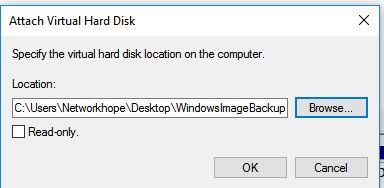
6. Now browse the path of the image folder and click OK.
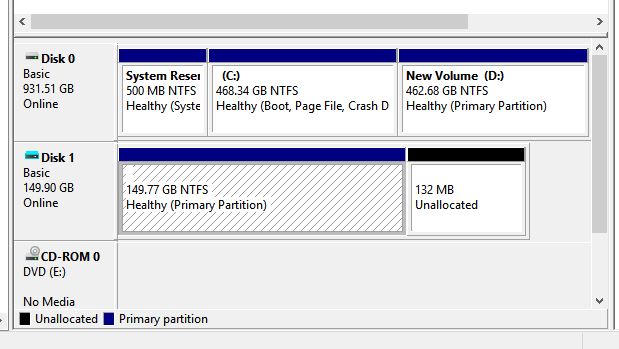
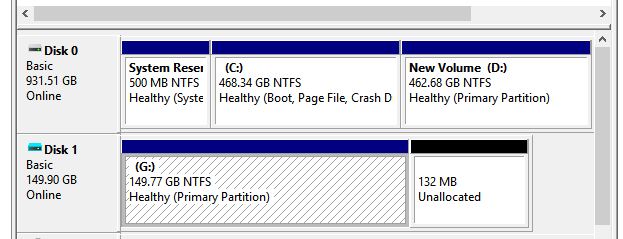
7. The drive will be mounted in Disk Management Utility as the next immediate Disk. In my case, it shows Disk 1 as shown in the figure below. The status will show Online, and it may not have a drive letter assigned to it.
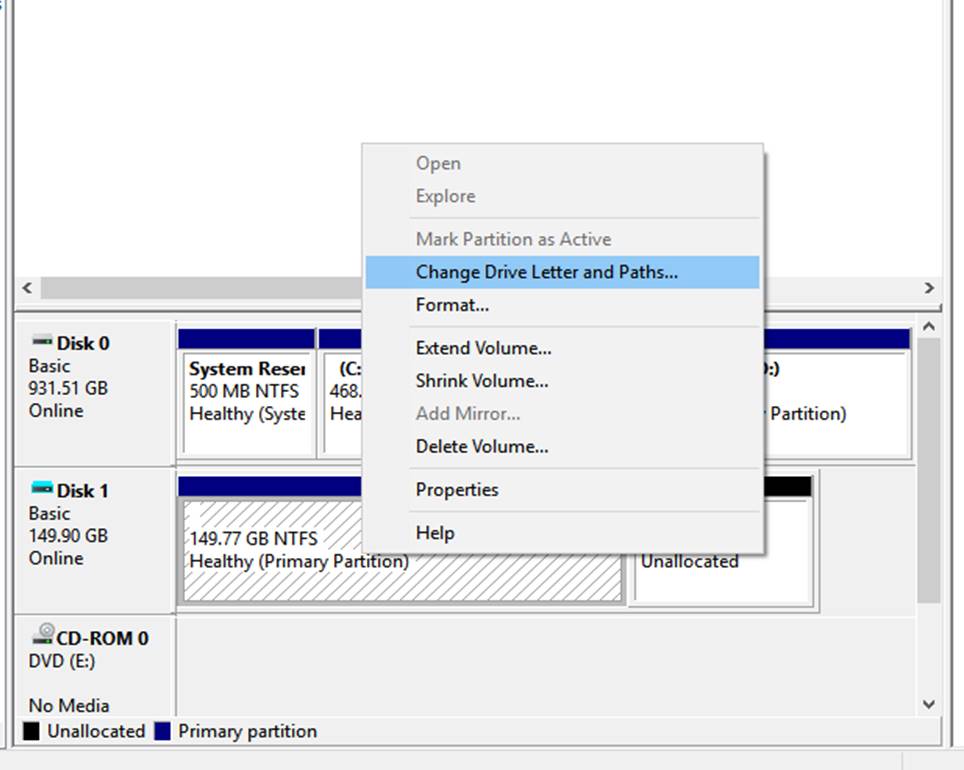
8. Once you get the Disk mounted, assign a Drive letter to the Disk. Otherwise, the image folder won’t open. Just Right-Click on the Volume and Go to Change Drive Letter and Path as shown in the fig below.
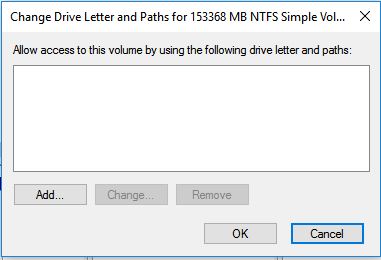
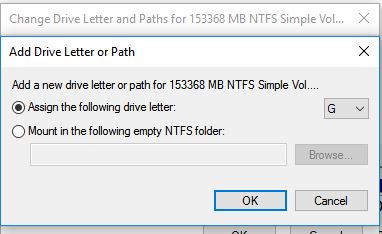
9. From the Change Drive Letter and Paths wizard Click Add button to add a new drive letter. Now assign any available Drive letter to the Volume. I am assigning the letter G as shown in the figures below.
10. Once you assign the Drive letter to the Volume, you can access the files from Windows Explorer or just Right-Click and open the volume.
Follow Networkhope for more Updates
Hope you like the post. Please comment or send me mail through Contact Page. You may also mail the admin from the footer section. Follow the Social media pages of Networkhope from the given links.