Disk management in Windows 10 is a built-in feature of the Windows platform since the Vista Operative system. Windows 10 also carries the legacy where you can manage the various parameters of Disks. May it be the internal hard disk or the external USB drives, disk management utility is a built-in, easy, and useful tool for managing the disks.
I recommend you to take back up of the disks before performing any change in disk parameters. You will lose data in the processes like partitioning, formatting of the drives.
How to access the disk management in Windows 10
You can access the disk management utility in following ways:
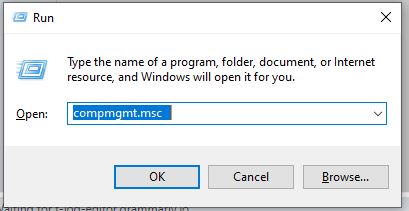
- From the run command: Type compmgmt.msc from the run command. Press Windows+R, type compmgmt.msc, then press the Enter button.
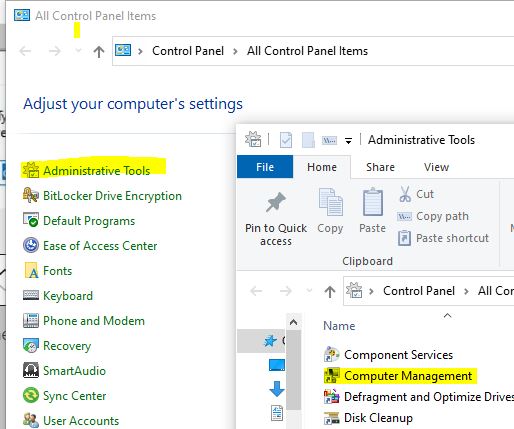
2. From the control panel: From the control panel, click on Administrative tools> then go to Computer management. (If you are not able to see Administrative tools in the control panel, switch the view to small icons from the right top of the control panel.)
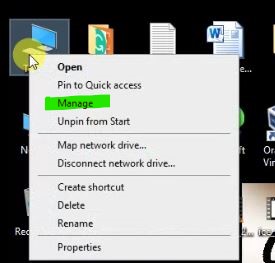
3. You can also open Computer management from This PC icon on the desktop. Right click on this PC icon and go to manage.
The manage screen will open like one shown in the following image:

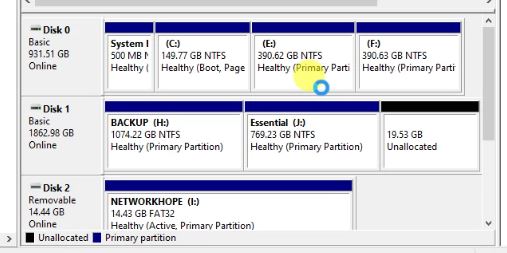
Once you enter the Computer Management wizard from the left pane, click on Storage, then Disk Management. All the connected disks will be displayed, as shown in the above figure. The upper portion shows the active partition and the lower portion shows all connected disk drives. You can also see other partitions like the recovery partition, system reserved partitions, etc., that are not visible to a user in normal file explorer.
In the above image, there are 4 partitions in Disk 0, and 1 partition in Disk 2. Disk 1 is a raw drive with no partition, marked as unallocated. Hence, you can see 5 partitions on the top space, and three disks at the lower space. Also, Drive C is marked as a boot partition. You will get all status information from this wizard.
What you can do from the disk management wizard?
From the Disk management in Windows 10 wizard, you can perform following tasks.
- Create a new partition
- Extend a partition
- Shrink a partition
- Delete a partition
- Format the partitions
Create a new partition
Now, let us create a new partition in the Disk 1. I will show you stepwise how to create a new partition in an unallocated drive. Windows call the partition/drive as volume, and the name of the partition/drive is called the volume label.
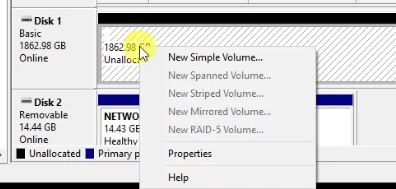
- Point the mouse cursor on the disk and click right. From the shortcut menu click on New Simple Volume. refer to the figure below.
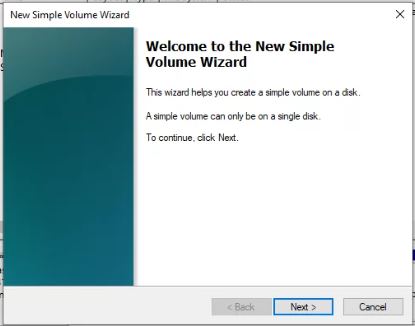
2. The next screen is the Welcome screen. You just have to click Next from here.
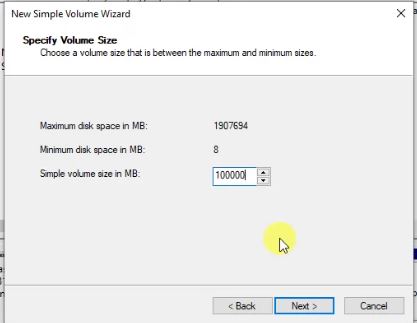
3. Now you will be prompted for selecting the size of the Partition, as shown in the figure below. The maximum size is total available space in the drive in MB. You can choose a partition size within the given limits of Max and Min disk space. Here I opted for a drive size 100,000 MB, i.e., roughly a 100 GB partition.
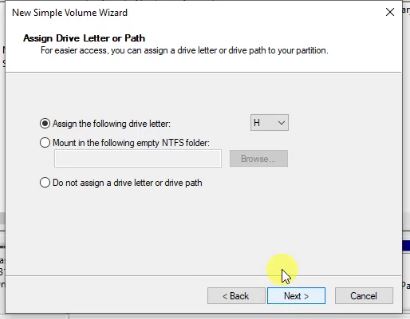
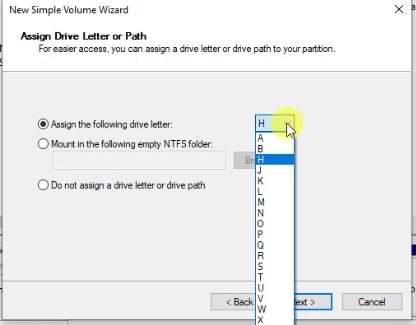
4. Next window will prompt you for the selection of a Drive letter. All the available Letters will be shown in the drop-down menu. Check the first radio button-‘Assign the following drive letter‘. Now from the drop-down, select available drive letters except A and B. Drive letters A and B are reserved for Floppy drives and not used. Click next to go to the next window.
SELECT FILE SYSTEM
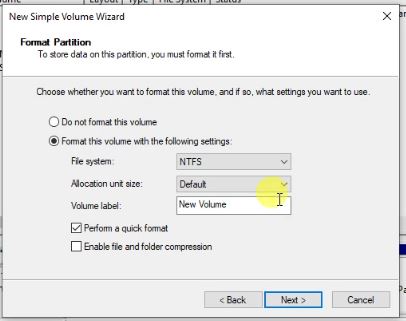
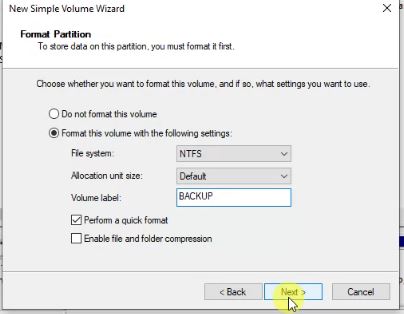
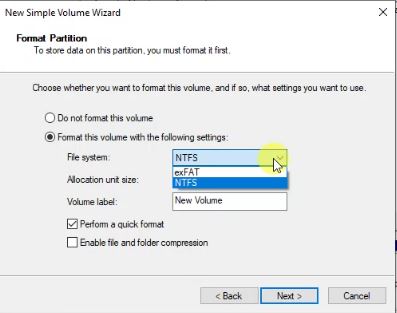
5. The next window will provide the format options. You can format the drive larger than 32 GB in NTFS or exFAT format in Windows. If the drive is less than 32 GB, you can format it using NTFS or FAT32 file system. Keep it NTFS if you are not sure about it. The default radio button is the second one, Format the volume. Let it be like that; select the file system, which is NTFS by default. In the field Volume Label, give the name of your drive, like Backup or anything you prefer. At the bottom, there are two checkboxes, the first one for a quick format, and the second one for Folder compression. Check as per your preference, else keep them as default. Check the above three figures for the illustration.
6. The next window will show you the summary of all the settings you have done so far. You may cross-check it here before proceeding. If everything seems fine, click finish to execute the format command.
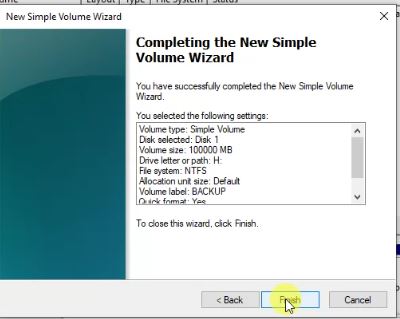
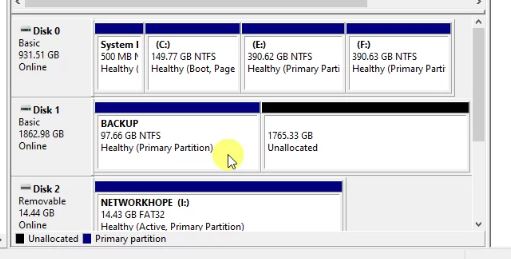
After completion, you will get the drive information like this. Here we have created a partition with a name BACKUP of approx 100 GB. The remaining disk space is still unallocated.
Extend a Partition
You can extend a partition if the same disk contains an unallocated space in it. You can’t extend a partition of one disk with the space of another disk. Now, we have a drive of 97 GB and around 1.8 TB unallocated space. I am going to extend the BACKUP volume by 1 TB. The new size will be around 1.1 TB. You will not get the exact size of the disk in GB because it does not follow the matrix system of counting. Exact 1 GB is 1024 MB, hence a slight variation in size is accepted. Or you can use the terms GiB, TiB, etc. for the accurate representation.
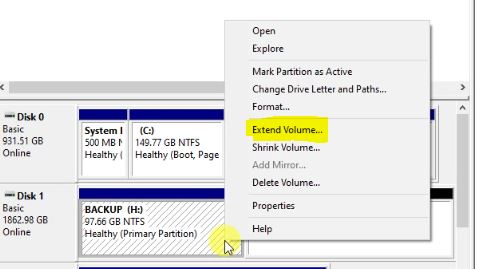
- Right click on the drive to be extended and Extend volume option.
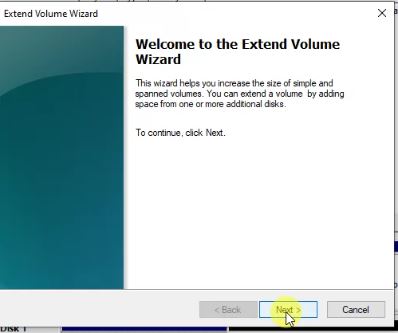
2. Welcome screen of the Extend Volume Wizard will appear, click next to continue.
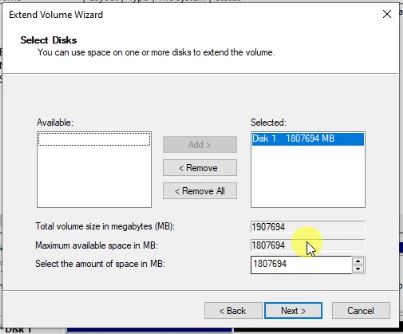
3. This screen will let you select the size to be extended. See the images below. The first image shows the maximum size that can be extended. You can see the drive size is roughly 1.9 TB and the maximum available space is around 1.8 TB. Since approx 100 GB space is already used by the volume BACKUP. By default, all available size is added to the volume which makes its new size equal to the drive size.
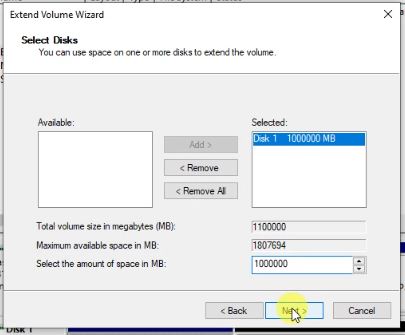
In the second image, the amount of disk space 1,000,000 MB or 1000 GB is added to the volume. The new size of the volume is 1100 GB.
Completing the Extend Volume
After the selection of appropriate space needed for a volume, click next to proceed. Remember that, if you want to make a 200 GB Partition, add only the difference of 200 GB and the original volume space. For example, if you have a 50 GB partition, add 150 GB to make it a 200 GB.
4. The Next wizard will prompt for a finish command. Check the parameters and click Finish.
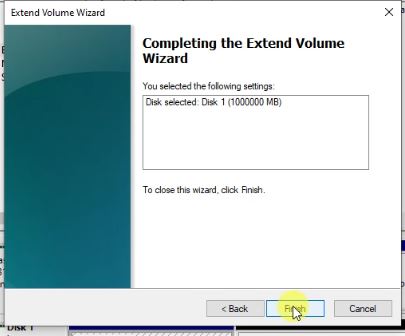
After successful completion, the new partition size will be like this. The size of the volume is now 1100 GB.

Shrink a partition
The best feature of disk management in Windows 10 is probably the shrinking a partition. By shrinking, you can reduce the size of a partition. The shrunken part of disk space will be unallocated. You can add that unallocated space to any partition or you can create an independent partition of this. To shrink a portion of the volume, go through the following steps.
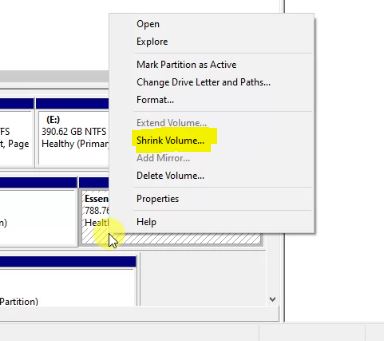
- Right-click on the volume to be shrunk, and click on shrink volume.
Shrink size
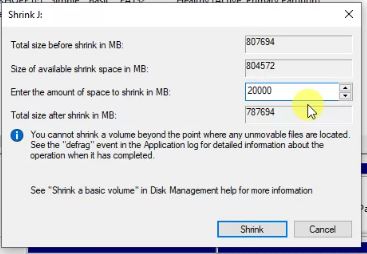
2. The next wizard will prompt for the shrinking size. Please understand this carefully. Check the columns carefully, the first row shows the total size of the volume. The second row shows the size available for a shrink. In the third row, you have to enter the amount of space to shrink. This size refers to the size of the new unallocated space. The fourth row will show the size of the volume that will remain after shrinking. The operating system automatically calculates it depending upon the data present on the volume.
Here, I wish to create a 20 GB partition, hence I opt for a shrink size 20000 MB. And the new size remaining on the volume under shrink will be 787 GB. Observe the following two images for better understanding. You have to decide the shrinking size as per the requirement of the drive size. If you have data on the drive, it will remain intact. Shrinking and extending the volume does not affect your data on the drive.

After entering the size for a shrink, click Shrink. It will take a few moments, depends upon the drive, speed, memory and a lot of parameters. After a successful Shrink operation, it will show you the result as follow:
Now, we have just spared a 20 GB free space from the Volume J without affecting the files on it. The space is unallocated, you can add it to any other partition in the same disk with the extend volume operation as mentioned above.
You can also create a FAT32 partition on the remaining 20 GB. A FAT32 partition can be made as a boot partition using the correct tools.
Delete and Format Partitions
Delete and Format operations deletes all your files, data, applications present in the partitions. Please make sure to backup everything before trying this.
To delete a partition, just right click on the partition and click delete.
Formatting a partition is same as it was done while creating a new partition. Just right click and select format from the shortcut menu.
Merge, Resize, and split partitions
With the proper use of Shrink, Extend, and create partition tool, you can merge partitions, split, or resize them. It is recommended to back up data before executing those operations. For the merging of two volumes, you have to delete one of them and extend another to add the unallocated space in it. For resizing, you can shrink the permissible amount of space from one volume and extend the other. You can split any volume with the help of the Shrink tool.
Here I am summing up the article on Disk management in Windows 10. I hope it will be useful for basic Windows users. Please share this article with your friends. Follow our social media link for regular updates.


Sir topic is really relevant.
But there is a submission from my side , u hv created pages on All social media platforms. But now a days as u know a very few people study the literature especially in practical side, most of them goes to you tube for vlogs. If u agree I request u to create a youtube channel for the same. On which other videos regarding our deptt like printer repairing, network sharing, printer sharing etc can also be uploaded
Thanks and regards
Well, besides the social media pages, I have also created a youtube channel on the first day. But I need to have adequate blogs before going for the vlogs. After a reasonable amount of articles, I will switch to that area too. Thanks for the suggestion.