Hello everyone! In this blog, I am going to illustrate how to change the font in the Cisco packet tracer. Those who find it clumsy with so many font labels, it will be useful to know how to change the fonts in Cisco packet tracer and what does it exactly changes.
I am using the Cisco packet tracer 6.2 full version or they say it an instructor version.
Don’t worry if you are in another version; it doesn’t matter at all. I am going to show you the screenshots to make it clear.
We are just starting the Packet tracer blog; let’s do it from the scrap. Today I will explain the mystery of all those font types. I assume you all have gone through the font setting of Packet tracer.
You all know that the Cisco packet tracer is an excellent simulator for the Cisco devices. Especially the beginners who are struggling to understand the overabundance of so many font settings; will find it helpful. Network Hope hopes so.
Why it is important to change the font in Cisco packet tracer
Once you start working, no matter whether you are a student, professional, or teacher, every individual has their priorities. Working for so long duration in an interface is tiresome. And if the font sizes are not exactly what you want them to be, it becomes more cumbersome.
So, at the very beginning, we want to customize it as per our convenience.
If you are new to the topic, I will show you the path, how to reach the font setting. And many different font labels are there, and what does that exactly alters.
So far, I saw so many blogs on the font setting of Packet tracer, but no one is exactly saying what do those 8 different font labels mean.
See the list of fonts you may change in packet tracer.
- CLI
- Headers
- Workspace
- Activity Wizard
- File Menu
- Tab Switches
- Tooltip
- Button/Labels
You can set each of them to a font size 8 to 20, and a handful of font styles are also there, I’ll show you all.
Besides, you may also change the background and font color for Router IOS and PC console. By default, IOS has white background black text and PC console has just reverse of that. You may customize them too, You may keep both of them identical too if you wish to.
How to get there?
The path for accessing the font setting is > Options (In file menu) > Preferences > Font.
Just navigate to the “Option” tab in the File menu, click on “Preferences”, a new “Preferences” window will open. Here just go to the Font tab.
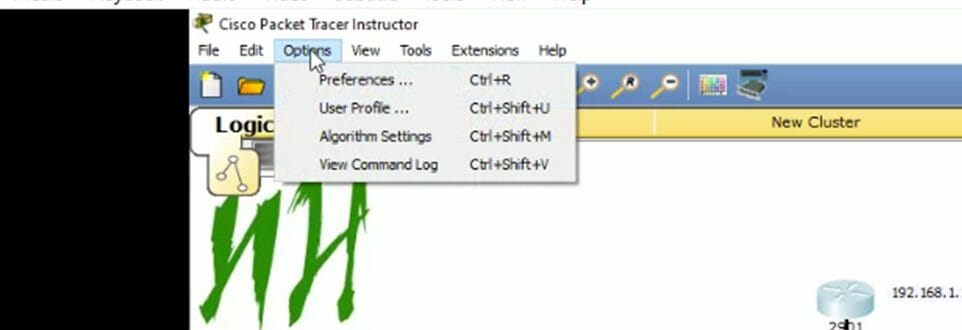
And now Go to Preferences, then click the “Font” tab. The screen will look like this:
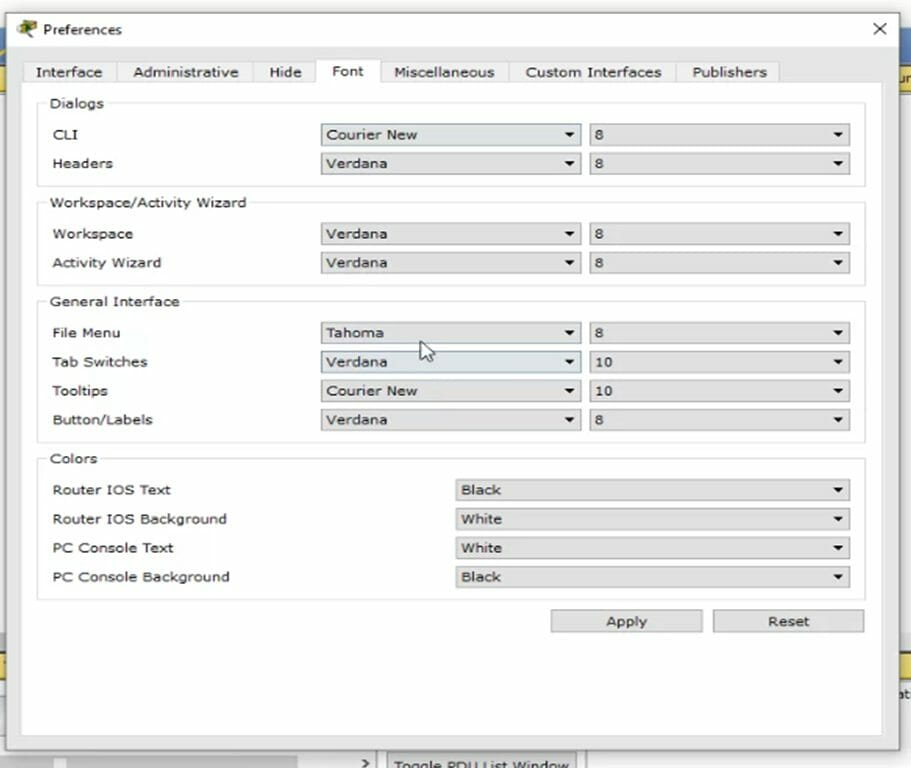
Now you can see all those 8 font labels from the list. I will say one by one. By default, 2 of them are set to 10, and others are set to 8 as you can see in the image above.
Rather than trying to explain, I will set each of them to size 20 (max) and show you what does it exactly changes. I hope, that will be more illustrative and more noticeable.
The CLI Font
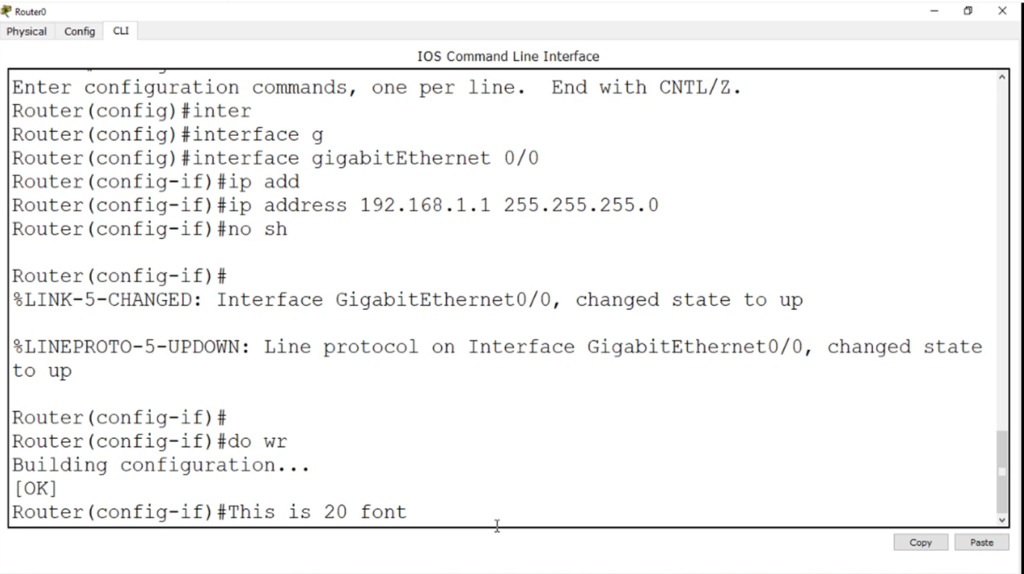
The first font label is CLI. It is applicable for the Command Line Interface of Cisco device, Router, or a switch most probably.
You may keep it around 14 if you feel comfortable. CLI is the most significant font, as you are going to do maximum work with this. Font style doesn’t really matter; still, you have two options: Courier and Courier New.
This font setting will change the size of CLI commands as shown in Fig below: –
The Headers Font
The second label now is headers. See where does it affect if I change it to size 20. All those Physical Interfaces and Config part headers are effected by this font setting. Preferably, you don’t need to increase them. For me, a font-size of 10 works pretty well; the excessive font size will results that this text will not contain in that box. See the images below for better illustration:
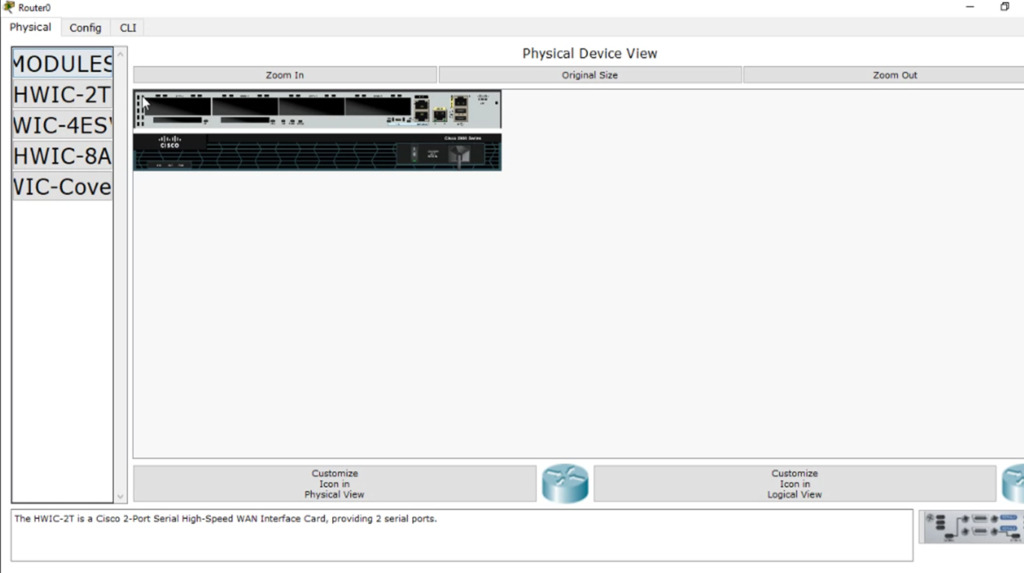
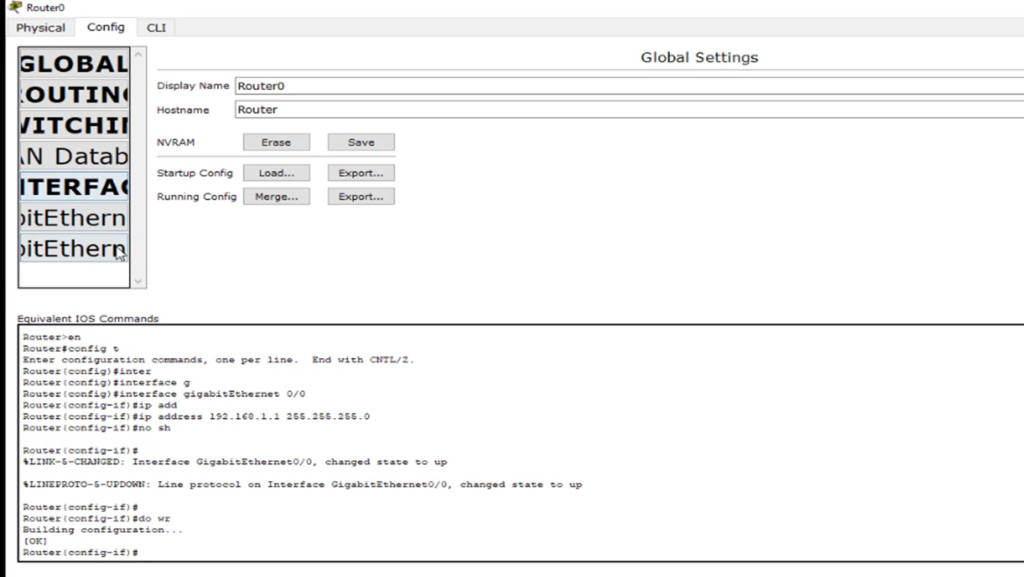
The Workspace font
The next Font label is Workspace. All those kinds of stuff around the working sheet, like the horizontal bar below the shortcut menu, or the device selection menu, ping statistics, etc. will be affected by this label. Again, I would recommend 9 or 10 sizes with a font style you love to see. You have 4 font styles in every label expect the first one, where I already stated, it’s 2.
Have a look at the image below, to view what does it change!
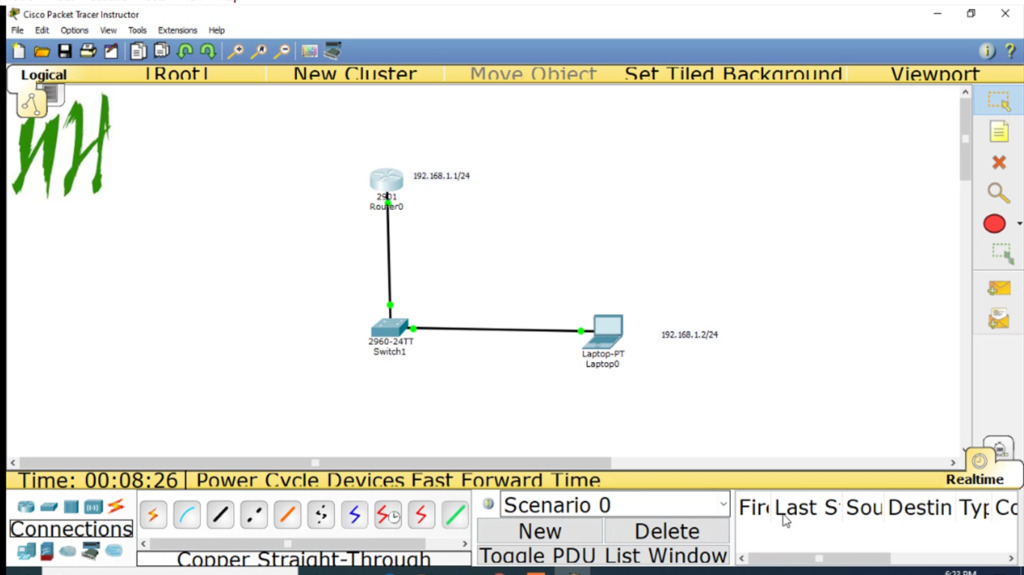
Activity Wizard Font in Cisco Packet tracer
The next one is Activity Wizard, if you are working in a Student version of Packet tracer, you don’t even bother about it. The activity wizard is available only on the instructor version of the cisco packet tracer. Here we are not going to discuss the activity wizard, how does it works, etc. Maybe later in another blog, we will come to this point. For now, just understand it’s like creating a master copy of the answer and give assignments to the students. The students later can compare their design with the master copy. If you have that instructor version, you may view this “Activity Wizard” option under Extensions Menu like this.
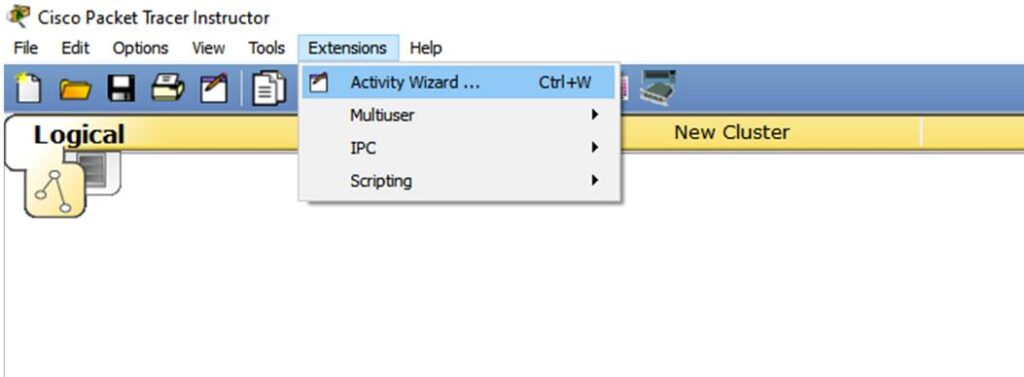
And if you change the font size here, it will be changing the font size of that Activity Wizard, which looks like this.
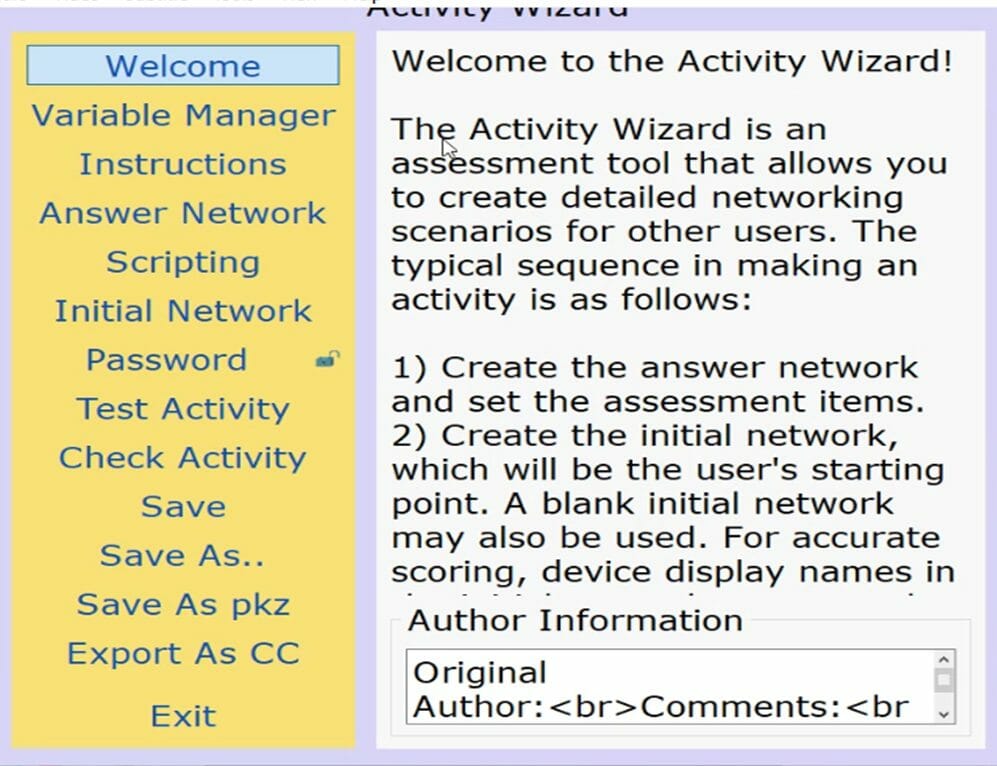
This label all about the font size of this wizard. That’s it, it has no significance in your work unless you go to this wizard. We have discussed four different labels so far, about the change in the font size in Cisco packet tracer, there are four more types of change of font in Cisco packet tracer.
File menu font size
Let’s now quickly move on to the next four. The next label is File Menu, quite obvious that it will change the font of the Menu bar. Let’s have a look:-
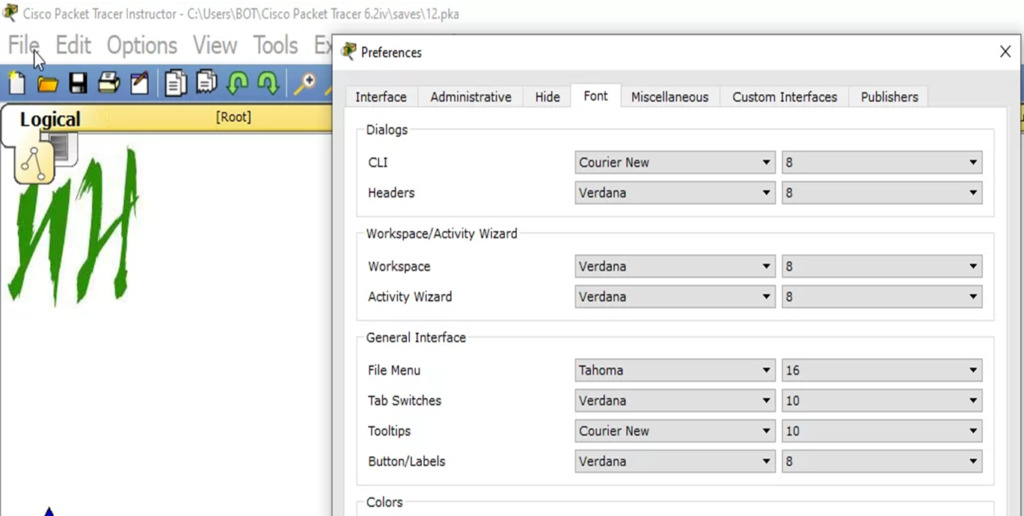
You can see the result with a font size of 16, in the image above. The increased font size of top menu bar. Just keep it as default, no need to change.
Tab switches
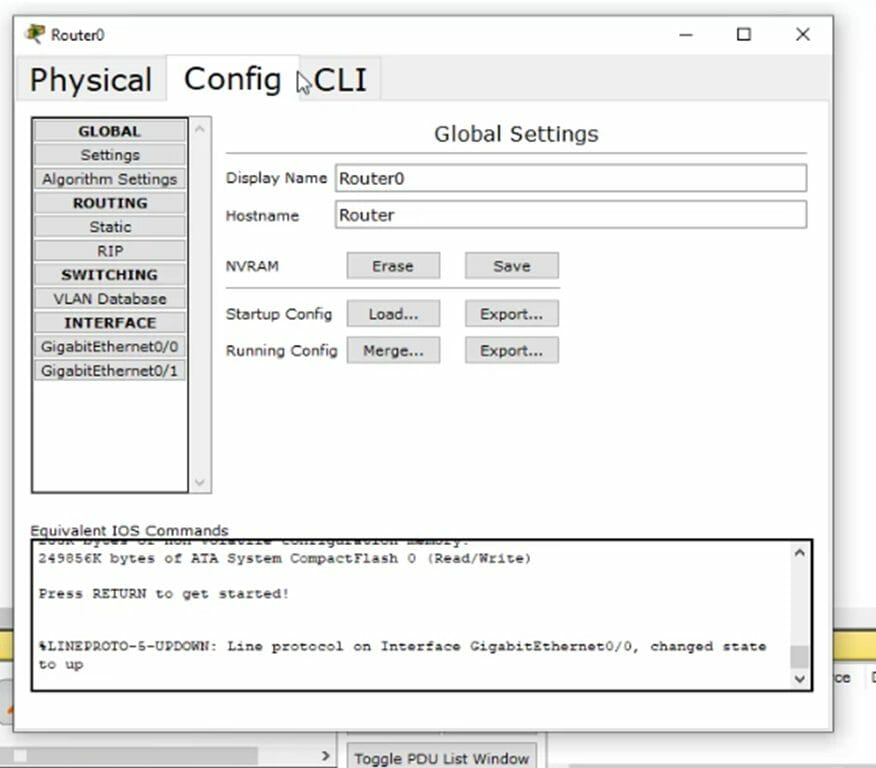
Next Label is Tab Switches. It means the upper tab in the device console when you open the IOS device. Like you can see here, The Physical, Config, and CLI tabs that are enlarged, belong to this setting. Again, I would say stick with the default size or make it 9 or a 10.
Hope it’s clear from the image below.
The tooltip font
The next label is a tooltip, which is important. When you place the mouse pointer over a device, it will show the summary of the device in a tooltip. You can set this font size and style as you like.
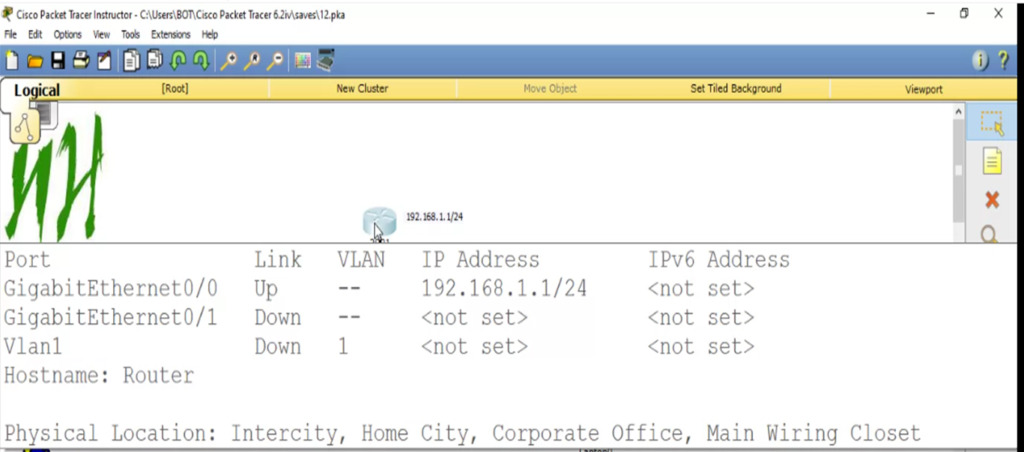
When you keep the mouse pointer on the router, it shows the basic configuration of the router. The font size is set to 8 by default. You may set it to 12 -14 as you feel better.
Buttons/ Labels
The final font setting is that of Button/Labels. This means the font size of labels of IOS devices when the various tabs are open. These two pictures below will make the concept clear.

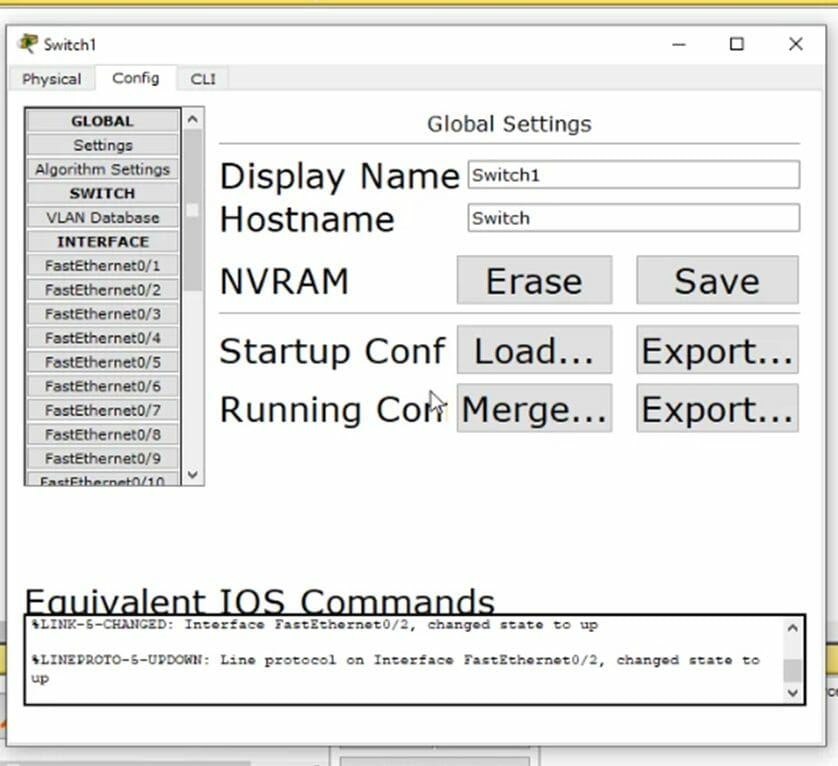
The portion you can see in the above pictures as increased size belongs to the Button and label category.
You can set the colors of IOS CLI and PC Command prompt from here as well. Or best to keep it default, i.e., black and white.
This was all about the font setting of the Cisco Packet Tracer.
If you have any suggestions, please feel free to comment or mail.
If you liked the article, please share it with your friends.
