
Rename User in Windows 10, it sounds simple and actually is. The deal is changing the Registry values and make it work with no issues. Once you rename the account, unluckily the Command Prompt will still remember the old account. I read somewhere, that you need to completely delete the account and create a new one to get rid of this. Luckily that’s not true. You can make the same account look like a new account everywhere, even in the command prompt.
Let’s see how to rename the user account in Windows 10. Before doing that, have a glimpse at what happens when we rename the account. Study the image below, try to work out what actually s the issue here. Well, I will explain it of course.
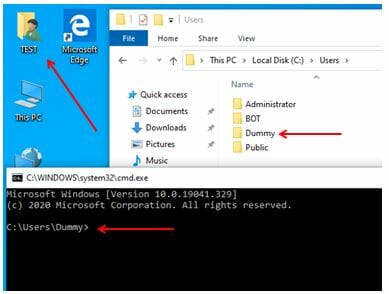
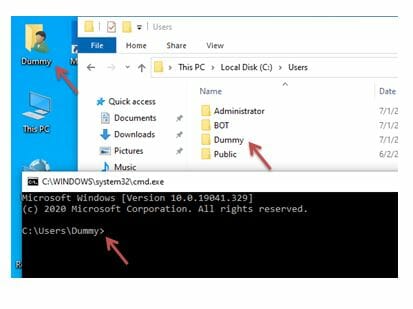
The account name was “Dummy” earlier, which was changed to the new name “Test”. The login screen at the start and the user’s file at the desktop are changed accordingly. But the Windows OS does not seem to be forgetting that names in C Drive “Users” Folder, and in Command prompt.
Since you have not created a new account, just had renamed the older one, the user profile is retained so far in the registry.
The folder “C:\Users\username” will still retain the Old User name. Moreover, every time you open the Command Prompt, the same Old user name will prompt. Well, you can get rid of it with the following tricks.
How to Rename User in Windows 10
OK, Let’s now see how to rename user in Windows 10 and fix all those issues too. It’s quite simple. Just follow the few steps as mentioned below.
First Ensure that you have another administrator account working on your PC. If you are thinking of renaming your current account, be sure to enable the Built-in Administrator account. To enable that just go to the properties of Administrator and Un-check the button labeled as “Disable this Account”. I will suggest you take a back up of Users Files in another Drive before proceeding.
Rename the User from Computer Management Console
Here, I have created a User named “Hope”, which I am going to rename now. You may refer to My previous Blog for How to Create Users.
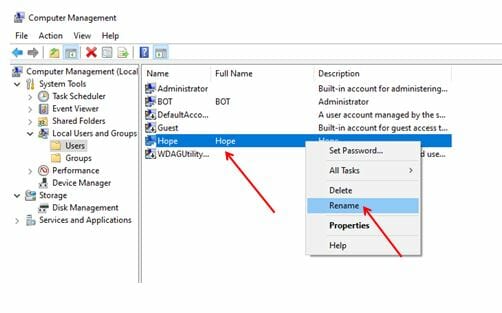
From the Computer Management screen, Right Click on the target User and Select Rename.
The name will be highlighted for edit, change the name here, and double click on the Object.
User’s properties window will pop-up.
Change the Full Name and Description here.
Keep the full name the same as the name for the time being. You can change it anytime using the Netplwiz command.
You can go to the “Member of” tab to change the User type. For more information on Netplwiz command and Member of tab, please read my earlier blog Create a new user in Windows 10.
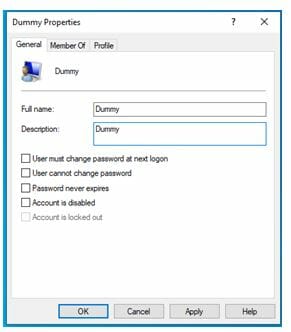
In the General tab, you can change the Username, Full Name, and Description. Besides, you have four check-boxes here. The second from the bottom is used to Disable or Enable any User. If you check this box, the user will be disabled.
After changing the name and all parameters, click OK. Now restart your PC and you will see the New User Name in the Login Screen.
Rename the C drive user’s folder
As I stated at the start, this will change the Login Name and the Users File Name. But the Users Folder in ‘C’ Drive is not changed. You have to Change it Manually.
To rename the folder of Drive C, you have to log in with another Administrator account, say built-in administrator account. For renaming built-in Administrator you may use your current running account.
Now Go to C:\Users\Username folder. In my case it is C:\Users\Hope, the folder will still have an old user name.
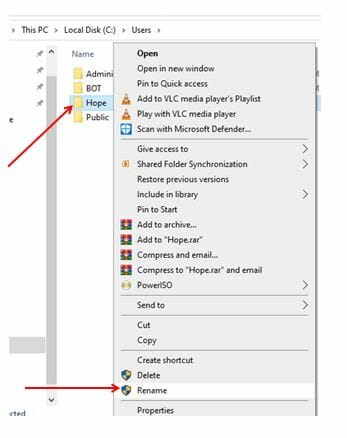
Now Rename the Folder with the new User Name. In my case its “Dummy”.
Editing Registry
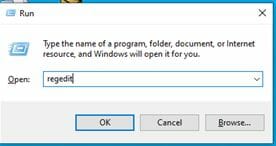
Now Go to the Run command (Windows Logo +R) and type “Regedit”. The registry edit screen will open. follow the following Path.
HKEY_LOCAL_MACHINE\SOFTWARE\Microsoft\Windows NT\CurrentVersion\ProfileList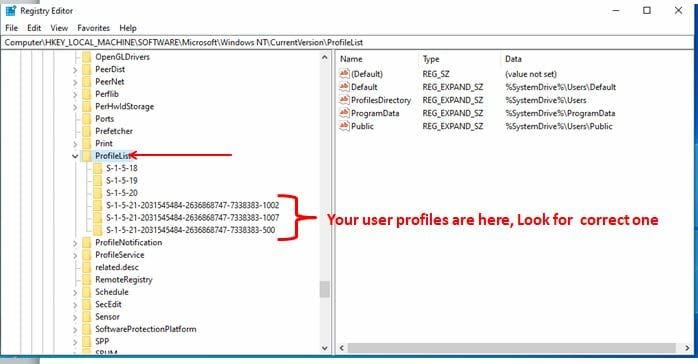
In ProfileList top three files are will have names- systemprofile, LocalService, and NetworkService. Don’t do anything to them. The three files marked in the picture above contains the information of each user account. It may be more or less on your computer depending upon the number of users.
Locate the name of your user among them, which account is changed recently.
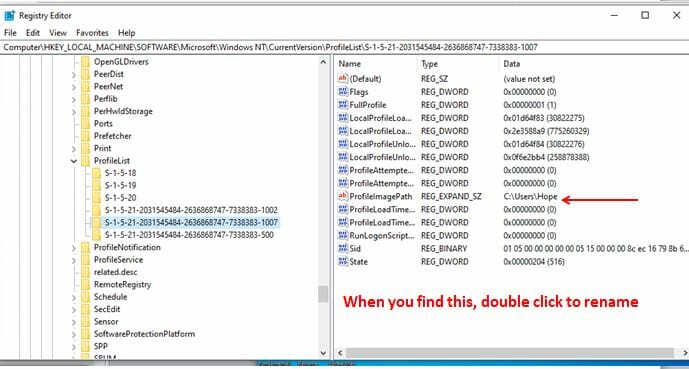
Once you locate the name, double click on that file, you will get the screen for editing name like one shown below.

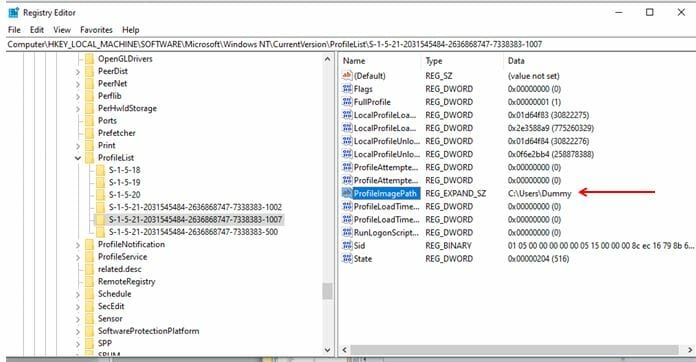
Once you Edit this name, Now click OK. Be careful while changing the registry values, ensure not to alter any other parameter. Once done correctly, your screen will look like this:-
Now, Close everything, Restart the PC and log in with the new account you have renamed recently.
Verify the account
Now Open the Command Prompt from Run Command . Windows logo +R and Enter. Then type CMD and enter. The command prompt will show the user you have renamed .
See now, all the three Windows will show the same username.
Hope you find this helpful. For more tips and tricks, keep following Network Hope.

Hey there just wanted to give you a brief heads up and
let you know a few of the images aren’t loading correctly.
I’m not sure why but I think its a linking issue.
I’ve tried it in two different internet browsers and both show the same results.
Very good post. I am experiencing a few of these issues
as well..
I am genuinely grateful to the holder of this site who has shared
this enormous paragraph at here.